1. When importing new camera captures into your Lightroom Catalog I would suggest you automatically convert your camera’s proprietary Raw files into DNG. (That is unless you are some über pro photographer TOTALLY SOLD on how fabulous the raw converter Nikon or Canon or whatever-brand-camera you use has provided.) But, for your consideration: “digital negatives” (DNG) generally average approximately 10% less in size than does a standard proprietary Raw file. As well, they encapsulate all metadata associated with your images – © information, keywords, image ratings you assign, processing history, rendering formulas saved as “snapshots” – all the stuff that normally lands in those XMP sidecar files if we decide to work in LR or Camera Raw for their processing.
So, by converting your Raw files into DNG’s at import you only have one file per image to keep track of, not two.
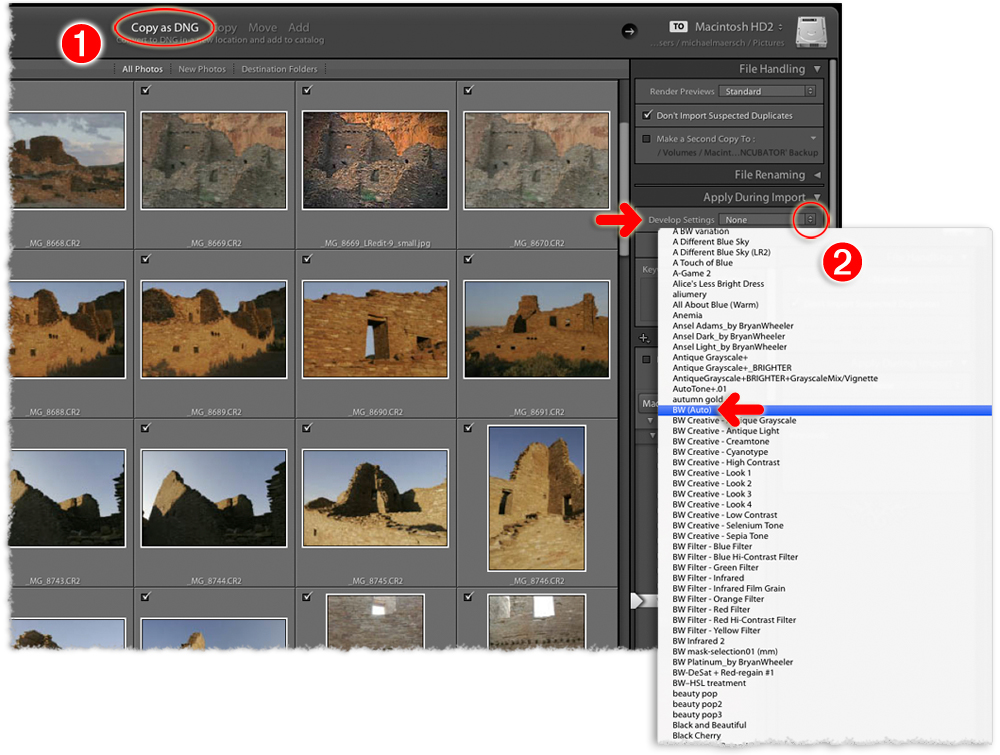
2. But the main thing here within the Import dialog for Lightroom is the “Apply During Import” panel in the right column. By clicking on those up/down-facing arrows at ‘Develop Settings’ here a popup allows you to select from all the Develop Presets you currently have loaded for use. They are listed in alphabetical order.
Simply scroll down to the new preset saved (“BW (Auto)”) to select it. When you click on the “Import” button to get this process rolling all of your images will automatically be rendered as B&W images!