|
||
 |
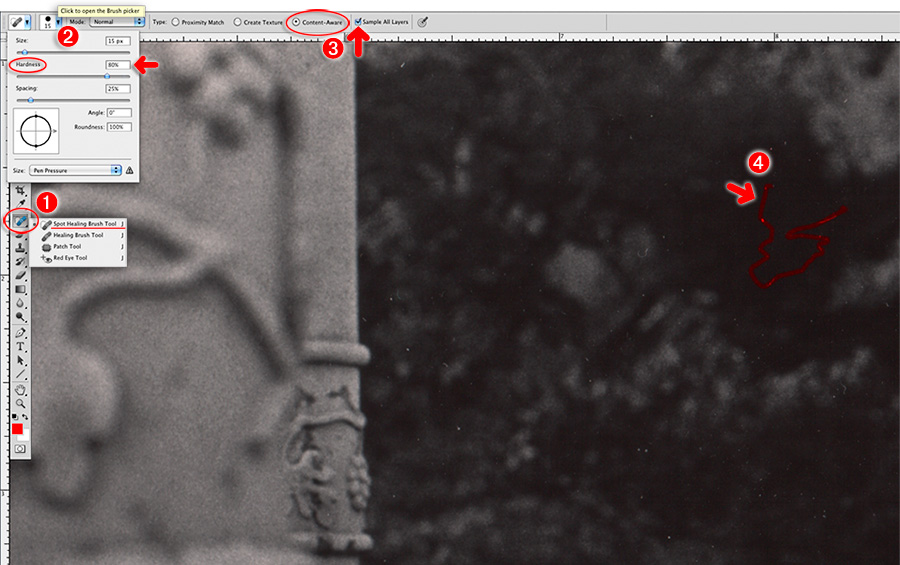
4) Click on the Spot Healing Brush tool in the toolbar. Then click on the Brush picker up in the options bar and select a round brush. Size doesn't really matter at this point because you will control the brush size by the 'left-bracket' key ('[') to make the brush smaller and the 'right-bracket' key (']') to make it larger, depending upon the imperfections you want to repair. I suggest you set the 'Hardness' of the brush to around/about 80%. Make sure 'Content-Aware' is selected up in the options bar and, equally important, check the 'Sample All Layers' box as well. Then using the right-bracket and left-bracket keys to control the size of your brush find a spot you want to repair. Hover the Spot Healing Brush tool over that spot, click your mouse and hold for a second before releasing. (I don't know if it's just my imagination, but I have found that moment I hold my mouse down after the click seems to help Photoshop 'better interpret' the surrounding pixels to make a more seamless patch.) If I have a number of imperfections very close to each other I am often able to click and slowly drag with the SHB-tool to effectively knock out a bunch of imperfections in one fell swoop! NOTE: This process of slowly dragging through an area to make repairs with CS5's Spot Healing Brush is a great way to get rid of 'lines' from chemical stains and scratches in scanned prints or negatives as well! |
|